
As autumn leaves crunch underfoot, I love how Halloween transforms the kitchen into a playful workshop. This year, I’re going for something a little less spooky and a lot more fun—an edible spider that doubles as a centerpiece. It’s surprisingly simple but looks eerily impressive, perfect for adding a dash of chaos to your party table.
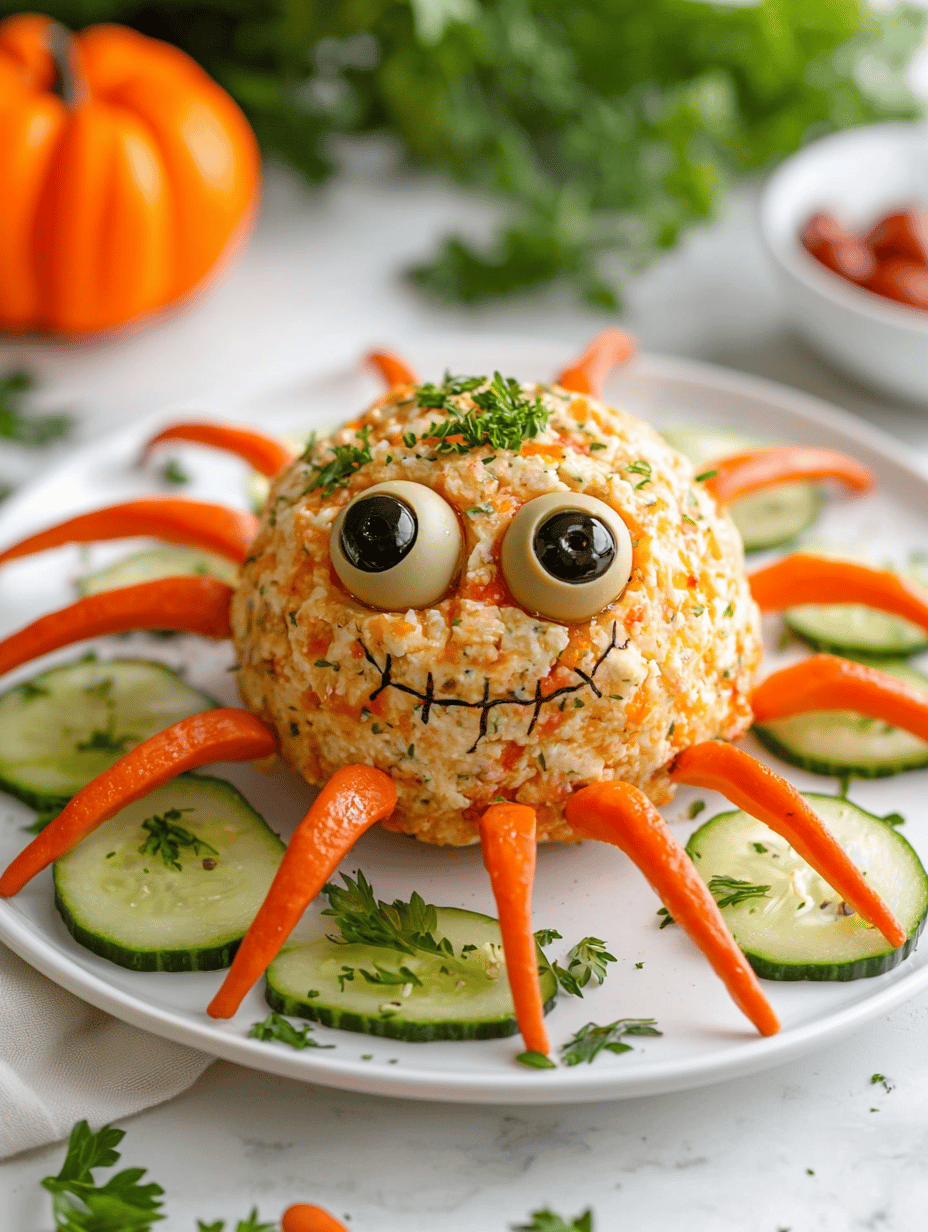
Imagine a creamy cheese ball, coated in crunchy herbs, with spidery legs made from crispy breadsticks or pretzel sticks. The smell of tangy cream cheese mingles with earthy spices, making it impossible to resist. Plus, the giggles and delighted squeals from guests make every minute worth it.
So, if you’re looking for a fun, game-day snack that sparks conversations and maybe some playful fears, this spider cheese ball is your new best friend. It’s a perfect way to celebrate the spooky season without overthinking the presentation. Plus, it’s quick enough to toss together on a busy Halloween afternoon.
WHY I LOVE THIS RECIPE?
- Joyful chaos during prep that sparks childhood memories of Halloween parties.
- Instant conversation starter—everyone loves a creepy, cheesy centerpiece.
- Relief from complicated appetizers—simple ingredients, big impact.
- Creative, playful, and adaptable for all ages and skill levels.
- The smell of toasted breadsticks and herbs as it comes together makes the house feel festive.
AVOID MY DISASTER (You’re Welcome)
- FORGOT to chill the cheese ball before decorating—melts legs and splats. Chill for 30 minutes first.
- DUMPED hot cheese on the plate—legs drooped. Let the cheese set a bit before adding decorations.
- OVER‑TORCHED the breadsticks—smoky aroma and brittle legs. Bake at 375°F for 5–7 minutes only.
- MISSED the symmetry—legs uneven, looks less spooky. Use a ruler or a paper template for placement.
QUICK FIXES THAT SAVE YOUR DAY
- When legs curl or break, dip them in warm water to soften, then reshape.
- Splash a few drops of olive oil on the breadsticks for extra crunch and shine.
- When cheese is too soft, refrigerate for 10 minutes for easier decorating.
- Patch up broken legs with tiny cheese balls, adding a layer of coating for stability.
- Shield the cheese with plastic wrap if you need to hold it longer before serving.
Creating this Halloween Spider Cheese Ball is more than just a fun project—it’s a chance to bring some spooky cheer and cheesy comfort to the season. Its playful design makes it a hit, no matter whether you’re hosting kids or grown-ups with a mischievous streak.
In a season full of costumes and candy, this edible arachnid offers a break from the usual and a little artful absurdity. I’ve found that the simplest ingredients can turn into a memorable centerpiece, echoing the joy of creating together. Now, all that’s left is to watch it disappear just as quickly as it arrived.
Halloween Spider Cheese Ball
Ingredients
Equipment
Method
- Place softened cream cheese in a mixing bowl and stir until smooth and creamy, releasing a slight tangy aroma.
- Add finely chopped fresh herbs and spices to the cream cheese, folding them in gently until evenly distributed. The mixture should be fragrant and slightly speckled with green or red hints.
- Transfer the mixture onto a piece of parchment paper and shape it into a tight, round ball using your hands, pressing firmly to ensure it holds together. Chill in the refrigerator for about 15–20 minutes to set.
- While the cheese ball chills, preheat your oven to 375°F (190°C). Arrange the breadsticks or pretzel sticks on a baking sheet lined with parchment paper and bake for 5–7 minutes until they are golden and crispy, then let them cool.
- Remove the chilled cheese ball from the refrigerator and roll it gently in coarse herbs or chopped nuts, coating the surface evenly for added texture and flavor.
- Poke small holes into the cheese ball to insert the crispy breadsticks as spider legs, arranging them evenly around the ball for a balanced, spider-like appearance. Secure with a small amount of cheese if needed.
- Add small decorative edible eyes on top of the cheese ball to give it a spooky, animated look, placing them carefully for symmetry.
- Place the finished spider cheese ball on a serving plate, arranging the legs so they spread out evenly for a dramatic effect. Chill for an additional 10 minutes if needed to help everything set.
- Once set, display this quirky, creepy cheese ball as a fun centerpiece on your Halloween table and enjoy with crackers or sliced baguette.
Notes
In the end, this Halloween Spider Cheese Ball isn’t just about the spooky looks; it’s about creating a shared moment of joy and surprise. The tactile fun of shaping the legs and arranging the eyes keeps everyone engaged. It’s a reminder that sometimes, the messiest, craziest ideas turn out to be the most memorable.
So, when the house fills with the scent of herbs and melted cheese, take a moment to enjoy the chaos. Whether it’s for a quiet night in or a lively gathering, this playful treat adds a little magic and a lot of flavor. Happy haunting, and happy snacking!